I'm gonna throw a few in here to
How to make a realistic wood texture from scratch (don't be scared, it easy)
Also feel free to play around with any of the settings to get different types and styles of wood.
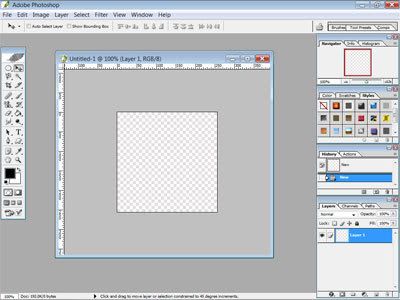
First create a new
document whatever size you will need. I'm going to use 256x256. It can always be cropped or scaled down, but making it bigger
blurs it.
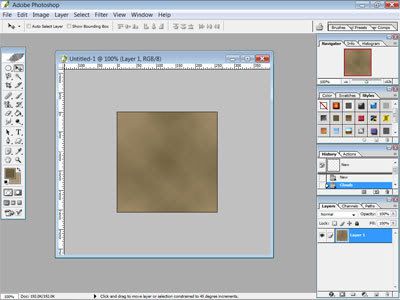
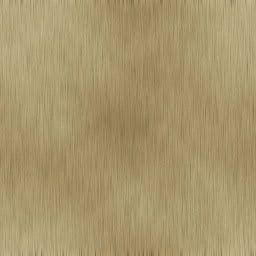
Next select two colors that are different shades of brown, one light and one dark. I used #6A5C3C for the dark and
#AA9471 for the lighter one. Go to Filter>Render>Clouds. Repeat it until you get something that is fairly smooth and
does not have nay very dark or light spots. This is the base.
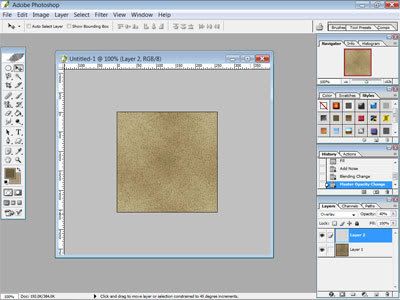
Now make a new layer. Fill it with white. Go to Filter>Noise>Add Noise and set it to monochromatic, Gaussian
and about 40-50%. Then change the layer's blending mode to Overlay and the opacity to about 40%.
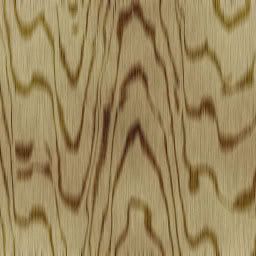
Go to Filter>Blur>Motion Blur. Set the angle to 90 and the distance to around 15. Now you should have this:
That is really all there is to making a basic wood texture. But what is you want more?
First you can change
the color and lightness of the wood texture.
Go to Layer>New Adjustment Layer>Hue/Saturation and Layer>New Adjustment
Layer>Brightness/Contrast. Then you just need to play with those tow layers' settings to get whatever look you want.
Dark
wood grain:
Create a new layer above all the adjustment layers. Select the brush tool. I use a brush of size 13 and 70
hardness for the grain. Select Black for your color and draw a few lines across the new layer.
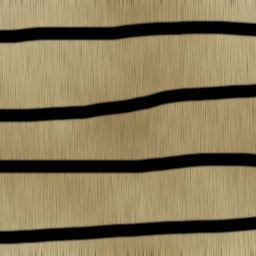
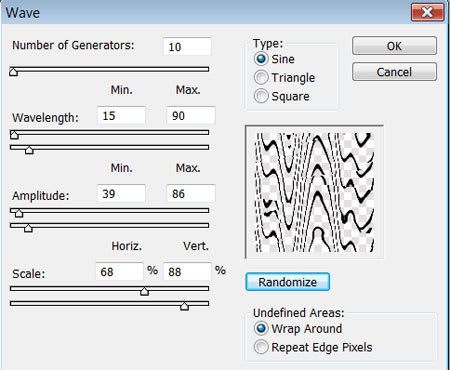
Go to Filter>Distort>Wave. Here is the tricky part. Play with the settings until you get something that is
sorta wavy but still kinda smooth. You can keep hitting randomize until you get something you like. Here is what I got and
the settings I used:

Notice how it looks good but there are still a few imperfections. Fix them with the Liquify tool in the Filter
menu. Just kinda play around with the blur and pinch tools (or whatever you feel like, you can always hit CANCEL and start
over) until you get something you like. You can also use Motion Blur or Gaussian Blur to get it to different looks as well.
Just be creative and remember that mother nature isn't perfect so you shouldn't be either.
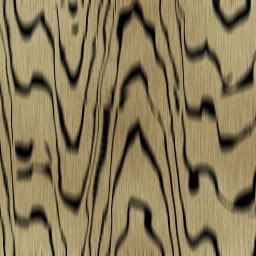
Change the layer blending option to Overlay and change the opacity to make you wood grain lighter of darker. If you
want a different color, you can use the layer style with a color overlay. The possibilities are endless....