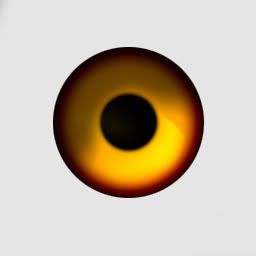
A step by step guide on how to make eyes in gimp. For the very first step you need the "map".
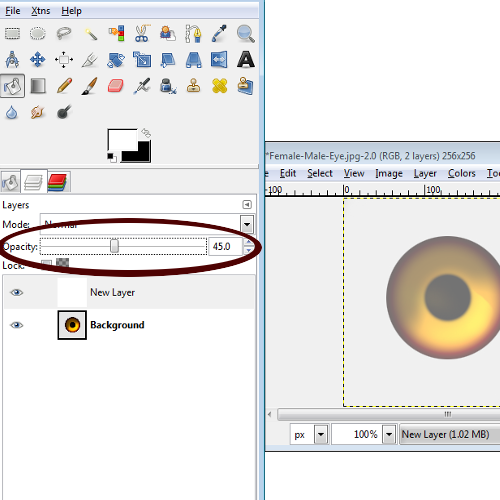
Next we open it in gimp of course. I like to make a new layer so that the whites of the eyes are actually white.So,
make a new layer and bucket fill it in with white.

Now lets set the new layers opacity down to 45.0 so we can see the positioning of the eye.
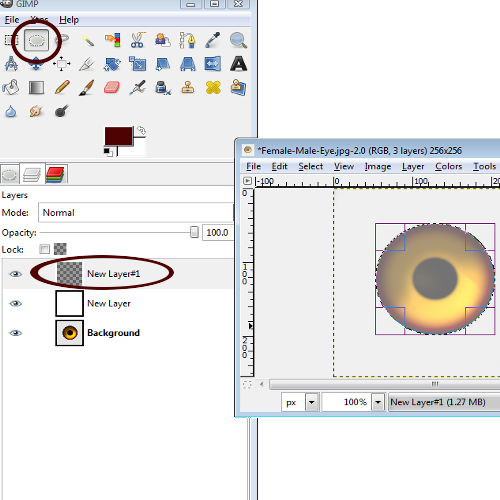
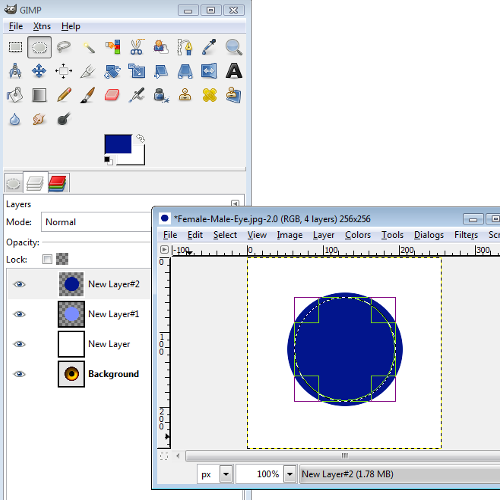
Now we make a new layer and take our eliptical tool and draw a circle in the same place and size as the eye on the
"map"
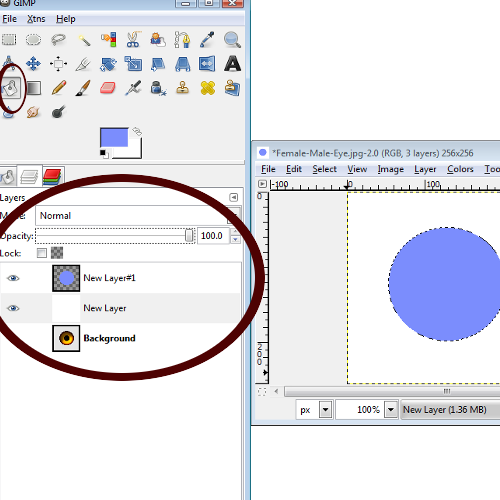
Now we pick the base color of our eyes,I will be useing a light blue, and we do a bucket fill on the new layer.It
will fill in only where we have selected with the eliptical tool. We can also set the opacity of the white layer back to 100
now.
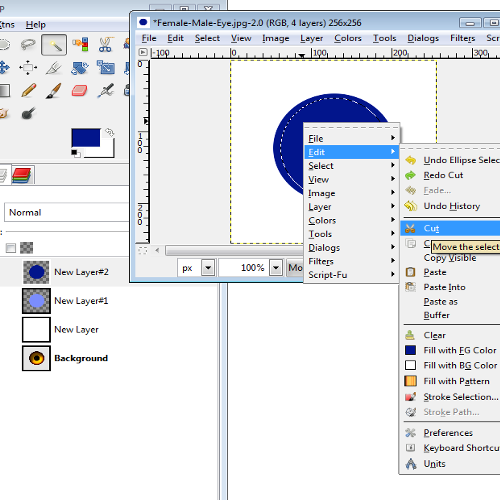
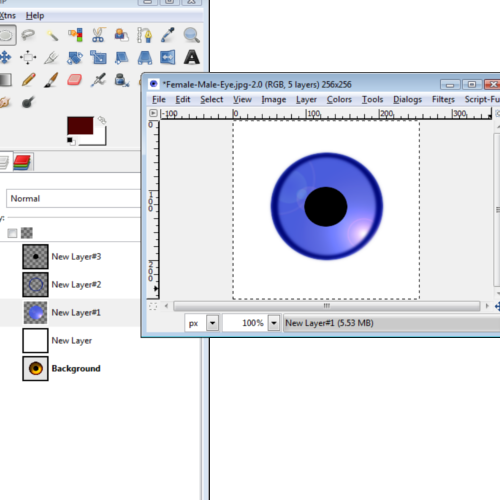
Now, we make a new layer and fill it in with a darker shade of the color we used.Then we take our eliptical tool
and make a smaller circle inside the bigger circle.
Now we right click the darker layer, go to edit, and click cut.
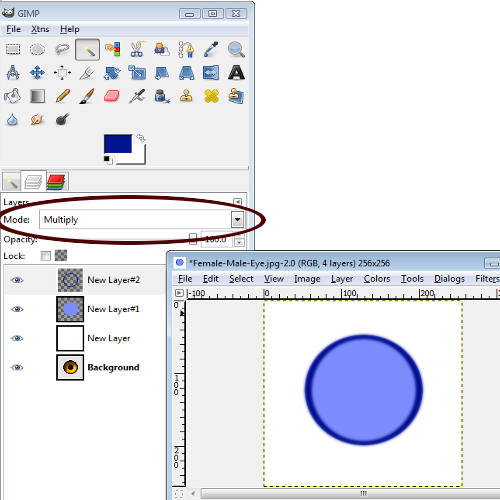
Now we do a small gaussian blur on the layer we cut. The default 5.0 is good.

Now set the layer to multiply and make a new layer.
We take our eliptical tool and make a small circle in teh center of the big circle.
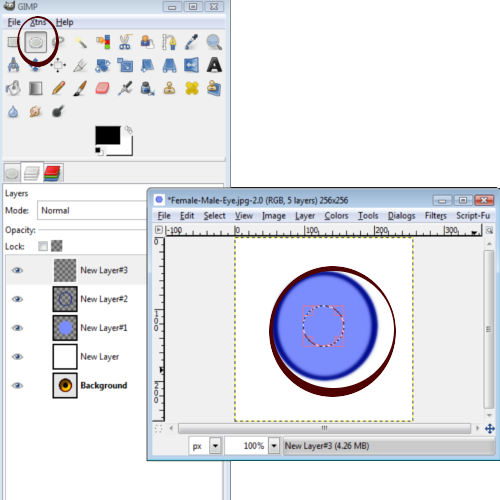
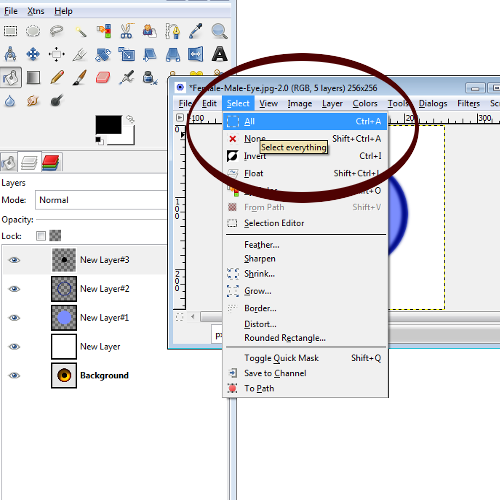
Now we fill that layer in with black. and then go to select- all and make a new layer.
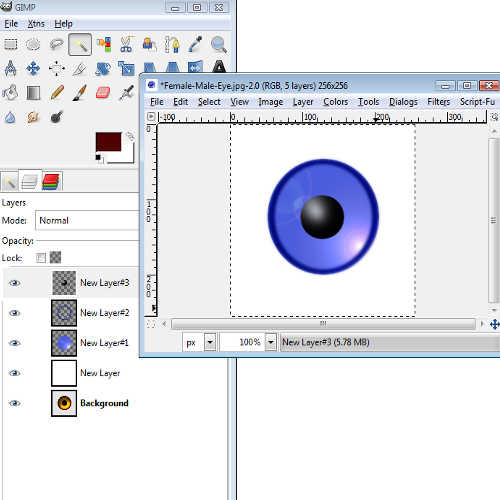
Now lets add some light. We go to our layers and highlight the first circle we made. Go to file - light and shadow
lighting effects. PLay around with the setings until you get a lighting you like. Mine ended up like this.
Now we do the same thing with the small black circle so that the light in the eyes extends there.Here is what I came
up with.
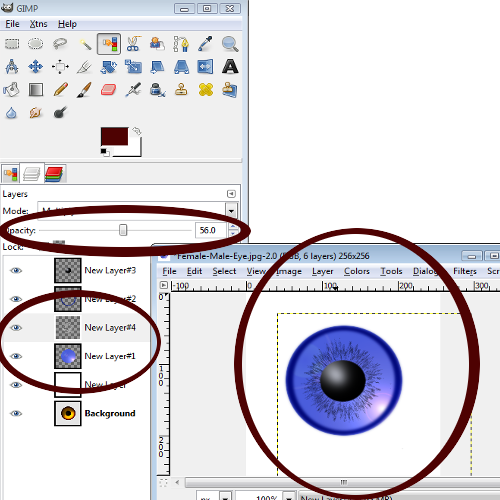
Now lets go back to that blank layer I had you make and try and make the eyes more realistic. we take out smallest
paintbrush and make a sunburst type pattern around the iris in black. now click the layer and move it down so that it sits
above the original circle we made. We then set the opacity of the layer to 56.0.
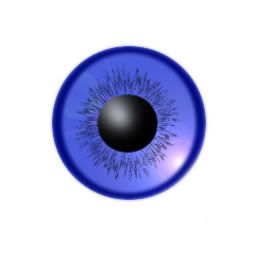
Now you can continue to play around with it, adding layers or symbols, or even veins in the whites of the eyes. But
for tutorial purposes, we are done!
Happy Createing!


